The perfect backpacking Japan itinerary! Japan is a fabulous, and bizarre country to visit; from the picturesque temples of Tokyo, geisha galore Kyoto, to history-filled Hiroshima. Here we have put together an awesome day-by-day guide on how to spend 14 days in Japan. You will also find costs, tips, and more.
Disclosure: Untold Wanderlust contains affiliate links. If you click on these links and make a purchase, we will earn a small commission at no extra cost to you. You can find our full disclosure policy and privacy policy here.
How to get to Japan
Japan can easily be reached by flight, making it super convenient for you to start your backpacking Japan trip! Just make sure you have proof of onward travel from Japan to avoid any complications when you arrive. With Tokyo being a global hub, you will find flights from all over the world. After backpacking South Korea, we flew from Seoul for just $66, with T’way Airlines. Once you arrive at the airport in Tokyo, consider purchasing a Sucia card to make travel around Japan easy and efficient. Once you have loaded it up, you can travel on all public transport.
A 14-day trip to Japan itinerary
This itinerary will see you through Japan’s most exciting cities which are filled with the weird and the wonderful. Each stop will not see you short of things to do. The first stop on this itinerary will be Japan’s vibrant capital city, Tokyo. The itinerary will then take you South to cultural Kyoto, before ending in Hiroshima. In total, you will spend 14 days in Japan. If you happen to only be on a day layover in Tokyo, make sure to check out this 24-hour Tokyo itinerary.
Tokyo itinerary 5 days
Day 1 – Meiji Shrine, Takeshita Dori & Shibuya District
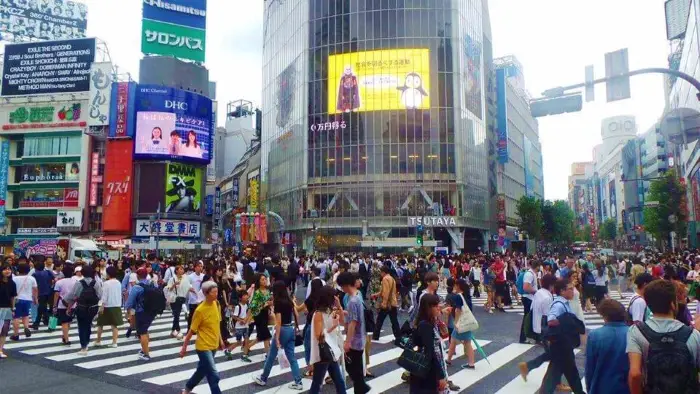
Day 1 of your backpacking Japan itinerary starts in Tokyo, with a trip to Meiji Shrine; a pretty shrine on tranquil grounds. It’s FREE to enter. Next up, explore the colourful street of Takeshita Dori. Here you will find quirky boutiques and interesting shops. Next, head over to the busiest crossing in the world in the Shibuya District. Here you can grab a bite to eat and enjoy a coffee in the Starbucks that overlooks the frantic crossing.
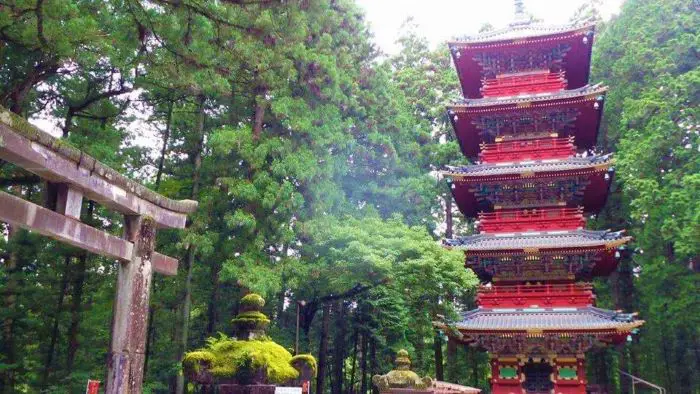
Day 2 – Day trip to Nikko
Take a day trip 2 hours North of Tokyo to Nikko. Nikko is filled with stunning shrines, temples and beautiful scenery. If you haven’t already purchased a railcard, we fully recommend getting the Nikko Free Pass; which allows you one return trip from Tokyo, and the use of buses around Nikko. For more information on a day trip to Nikko, head over to this detailed post of things to do in Nikko.
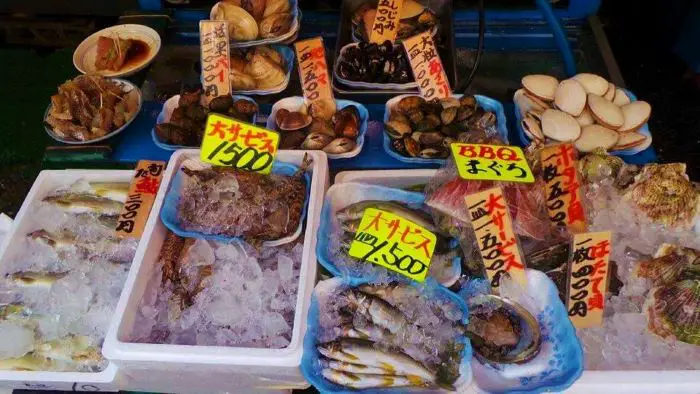
Day 3 – Tsukiji Fish Market, Harajuku District & Asakusa District
Wake up super early and head over to Tsukiji Fish Market; the largest fish market in the world. To see the market in full swing, you will need to get there at around 5 am. Don’t leave wait until the afternoon as we did, you will end up disappointed that all the sellers have wrapped up and gone home. After sampling some world-famous sushi, it’s time to head over to the anime mad district; Harajuku. The streets are full of anime in every direction. Even the adults are dressed up as their favourite anime characters. Finally, end your day with a trip to Asakusa District. Here you will find Sensoji Temple; which is completely stunning when lit up at night.
Day 4 – Day trip to Hakone & Mt. Fuji
Take a day trip to Hakone. From Hakone, you will be able to see the easily recognizable silhouette of Mount Fuji (provided it’s not a misty day), from across Ashinoko Lake. To reach Hakone, we recommend getting the Fuji Hakone Free Pass. Similar to the Nikko Free Pass, it allows for a round trip from Tokyo and the use of transport around Hakone. Alternatively, you can book your trip online in advance so you don’t need to stress about organising your trip whilst on your holiday.

Do you plan to spend the night in Hakone? Check out the best onsen to stay at!
Day 5 – Shinjuku District, Piss Alley & Golden Gai
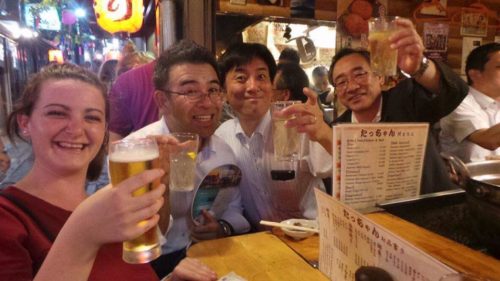
Today is the day when you can take things slow and relax. Head over to Shinjuku District. Explore the streets and do a spot of shopping. Located in the Shinjuku District is the Tokyo Metropolitan Government Office, which should certainly make it onto your Tokyo bucket list. Here you can see panoramic views of Tokyo City below. If you’re super lucky, on a clear day you can even see Mount Fuji in the distance. The best part is it’s completely FREE. Finally, wrap up your time in Tokyo with dinner on Piss Alley and a few (expensive but worth it) drinks on Golden Gai. Golden Gai, is a set of narrow streets that are home to the tiniest bars you will ever come across; only 8-10 people can fit in each bar.
Have more time in Tokyo? Check out these other day trips from Tokyo
Where to stay in Tokyo
Feeling luxurious: Cerulean Tower Tokyo Hotel – Super luxurious! Boasts a swimming pool, sauna, hot tub and beauty salon. It’s the perfect place to start or end your trip to Japan.
Budget private room: Sakura Hotel Nippori – Has cheap Japanese-style rooms. Breakfast is included in the price!
Dorm life: Hostel Wahaku Kura – A very clean hostel that is excellent value for money. Each dorm bed has a curtain for added privacy.
For more prices and deals on other properties in Tokyo, CLICK HERE.
Kyoto 4 days itinerary
Day 6 – Travel from Tokyo to Kyoto
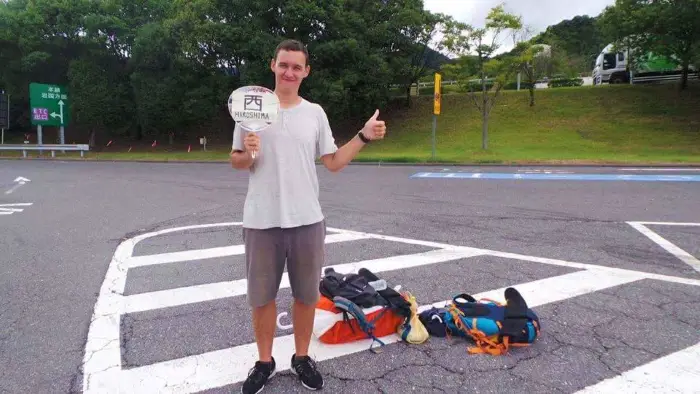
After ticking off Tokyo’s main attractions, and possibly even delving into the weird and unique things in Tokyo, it is time to head to Kyoto. To get to Tokyo you can take the train or the bus. The cheapest option would be to take the bus. We recommend looking into Willer Express Bus. Having previously hitchhiked on our trip to Mongolia, we decided to try our hand at hitchhiking through Japan too, to save on costs.
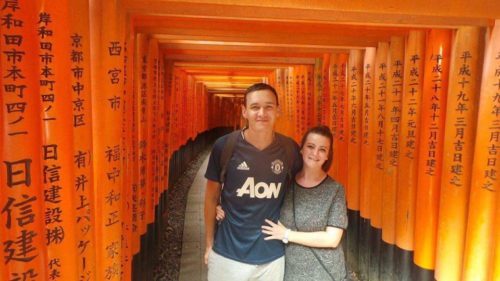
Day 7 – Fushimi Inari Gates, Ninenzaka Street & dinner at Fire Ramen Restaurant
Wake up early and take a 40-minute train journey to the famous Fushimi Inari Gates. There are over 10,000 gates that line the pathway leading up to the mountain. Next, take it easy and rent an electric bicycle to explore the city. One street, in particular, is Ninenzaka Street; lined with cute shops and eateries. There are many beautiful sights and temples to see within the city. After a day of familiarizing yourself with Kyoto head over for a memorable dinner at Fire Ramen Restaurant. The restaurant is famous for its dangerous cooking style of lighting your noodles on fire, right before your very eyes.
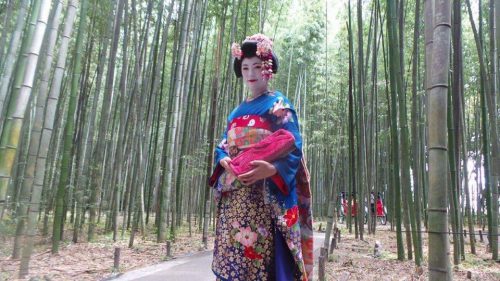
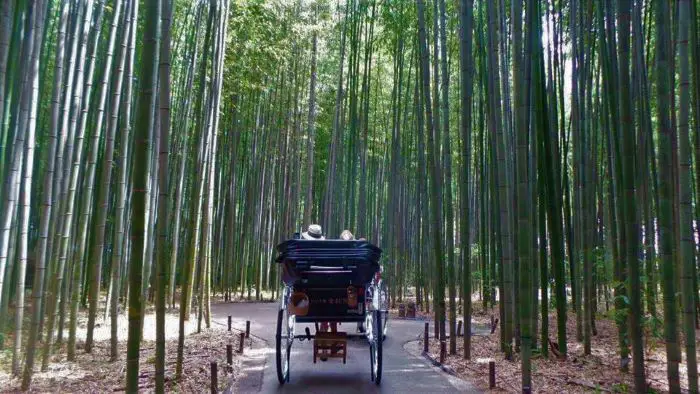
Day 8 – Bamboo Forest, Kinkakuji Temple & geisha spotting in Gion
Keep hold of your electric bicycle for the day and cycle through the stunning groves at the Bamboo Forest. The Bamboo Forest is a famous attraction and should not be missed whilst in Kyoto. The area surrounding the bamboo forest is also very tranquil, and a nice place to ride through on your bike for a while. Afterwards, continue to cycle to the picturesque temple of Kinkakuji. The entrance is 400 yen ($3.70). Finally, finish up your day with some geisha-spotting in Gion.
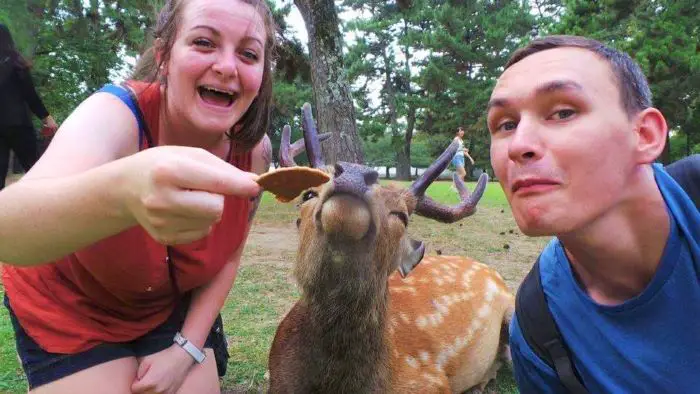
Day 9 – Day trip to feed the deer
Take a day trip to Nara. Nara is a small city and you can easily explore it in a day. The main attraction in Nara is the sacred deer that roam freely in the streets. The cheapest way to get to Nara is to take the Kintetsu train line which costs 620 Yen ($5.70) and takes 50 minutes. There is an express train that takes just 35 minutes, but costs double the price. For more information on a trip to Nara, head over to our Nara day trip guide.
Do you have extra time in Japan? Consider heading to Osaka after Kyoto for more awesome day trips to other places.
Where to stay in Kyoto
Feeling luxurious: The Thousand Kyoto – The rooms are well equipped with TVs and coffee machines. The hotel also boasts a fitness centre.
Budget private room: The Pocket Hotel – Great location and friendly staff. The rooms are small but are well-kept.
Dorm life: Guest House Kyoto Inn – Great value for money, and breakfast is included. The hostel offers mixed dorms and female-only dorms.
For more prices and deals on other properties in Kyoto, CLICK HERE.
Hiroshima itinerary 4 days
Day 10 – Travel day from Kyoto to Hiroshima
Today you will make the journey from Kyoto to Hiroshima. This backpacking Japan itinerary dedicates 4 days to Hiroshima and surrounding day trips, but if you are strapped for time, we recommend sticking to Hiroshima and Miyajima. If you have purchased a railcard then use it! Alternatively, consider taking the bus or even hitchhiking.
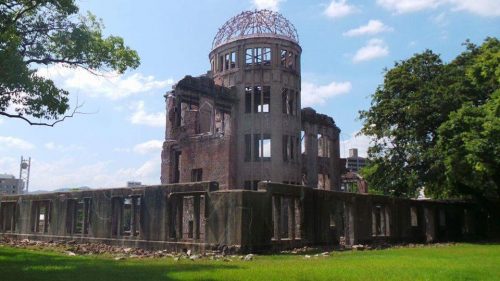
Day 11 – Peace Memorial Park to learn the automatic bomb history
Spend the day exploring Hiroshima and the Peace Memorial Park, where you will find the Atomic Bomb Dome, which is one of the interesting landmarks in Japan. Delve into the history of the atomic bomb that was dropped on 6th August 1945, which caused much devastation to the Hiroshima Prefecture.
Day 12 – Day trip to Okunoshima Island (Rabbit Island)
Take a day trip to Rabbit Island, officially known as Okunoshima Island. The island (hence its name) is filled with fluffy little bunnies that hop freely around. The cheapest way to get to Okunoshima is to take the train from Hiroshima to Hiro Station, and then transfer to Tadanoumi Station (the train bound for Mihara). From Tadanouimi Station the ferry port is about a 3-minute walk away. Here you can buy your ferry ticket to Okunoshima Island for 620 Yen ($5.70) return. You can also purchase snacks for the rabbits here too. The total journey time from Hiroshima to Okunoshima Island is around 2 hours.

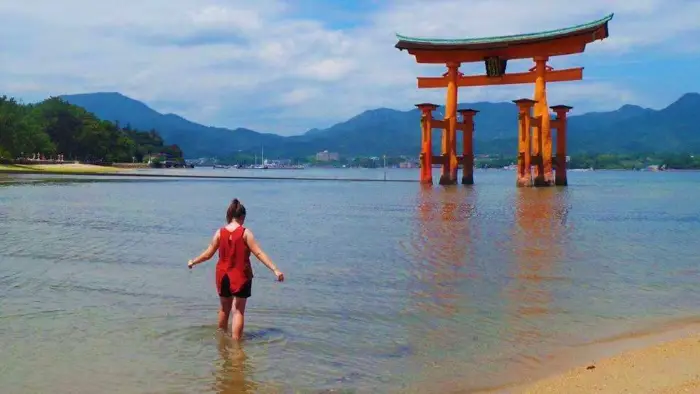
Day 13 – Miyajima Island, Hiroshima Castle & last-minute shopping
Head over to Miyajima Island; the photogenic island that boasts a floating tori gate in the lake. Take some time to get some pretty snaps and then go explore the island which is filled with nature spots and shops. To get to Miyajima Island take tram line 2 to Miyajimaguchi, which costs 260 Yen ($2.40) one-way. Then take a 10-minute ferry which costs 180 Yen ($1.65) one-way. After taking the morning to explore Miyajima Island, head back to Hiroshima to check out Hiroshima Castle. The castle looks as though it has been pulled straight from a storybook. Finish the day off with a traditional Japanese meal before buying some last-minute gifts and souvenirs.
Day 14 – Leave Japan
After a whirlwind of time, this backpacking Japan itinerary has finally come to an end. It’s time to wave goodbye to Japan and take your flight home or to your next destination. We continued South towards Saga; where we took our flight out of Japan, ready to backpack Vietnam. However, if you loved your trip to Japan so much, why not consider teaching English here? Check out this post about everything you need to know about TEFL in Japan.
Where to stay in Hiroshima
Feeling luxurious: Sheraton Grand Hiroshima Hotel – Are you looking to get away from the heat of Japan in the summer? This is one of only a few hotels that boasts a swimming pool. The rooms are modern and spacious too.
Budget private room: Hiroshima Crane Peace Tower – Newly built apartments. Rooms are modern and great value for money.
Dorm life: Hostel Mallika – A wide range of facilities! Aside from the usual facilities, you expect in a hostel, this hostel boats game consoles, Nintendo Wiis and laptops for their guests to use.
For the latest prices and deals on properties in Hiroshima, CLICK HERE.
2 weeks in Japan budget
Currency: The local currency is the Japanese Yen. The current exchange rate is 108 Yen to $1.
Daily budget: $40 per person per day. This covered the cost of food, attractions and inter-city transport. We couch-surfed to save on accommodation and hitchhiked from the major cities to the next. If you do not plan to couch surf and hitchhike, you should consider a budget of between $75-100 per day, per person.
For more tips on ways to handle your money & budget whilst on the road, click here!
Accommodation: The average cost for a basic double room with a private bathroom is $40-65.
Food and drink: A meal at a local restaurant ranges from 800 – 2,000 Yen ($7.50 – $20). There is so much delicious food in Japan and prices can vary massively depending on what and where you eat. If you’re on a super tight budget, you can always find plenty of meal deals at Lawson’s convenience stores. Check out these must-try Japanese foods!
Local public transport: Japan has an extensive metro system. The starting price of a ticket within the city is around 170 Yen ($1.50).
Across-country transport: Many travellers opt to buy a rail card for Japan. The most popular pass is the JR rail pass. For a cheaper alternative, consider the bus passes on offer from Willer Express.
Backpacking Japan travel tips
Fill up water bottles – The water in Japan is safe to drink. Make sure to invest in a water bottle and refill it throughout the day. This will save you a ton of cash on bottled water!
Eat at the convenience store or cook – Eating out in restaurants can easily rack up the costs. We suggest cooking food at your accommodation or buying cheap pre-cooked meals at the many convenience stores. Spaghetti bolognese from Lawson’s was our favourite! Limit eating out to once every 2 days.
Plan your route – Japan is a relatively expensive country to travel to, so we recommend planning an efficient route. This will save you money on doubling back on the metro system.
Consider hitchhiking and couch-surfing – If you want to keep the costs down, then consider hitchhiking and couch-surfing. We did this throughout our whole trip, and we saved a lot of money. The Couchsurfing app is free to sign up but we highly recommend investing in the paid verified version as this will massively increase your chances of finding a host.
Use the buses instead of trains – If hitchhiking isn’t your thing, but you have a low budget, then consider using the buses instead of the high-speed trains. Buses work out much cheaper than trains!
Stick to a budget – This is probably the most important backpacking Japan tip…create a budget list! Set out a budget list of how much you want to spend on accommodation, food, and activities. And STICK TO IT! By sticking to a budget, you can manage your money and expenses better.
Have fun – Last but not least, have fun; don’t let money be an issue. You can still have a great time backpacking in Japan without having to break the bank.
Consider travelling to Japan in Fall – Japan in the fall looks breathtaking. The fall colours framing the temples are a sight to behold. Don’t believe me? check out these Japan in Fall photos.
Click here for more detailed backpacking Japan travel tips.
Essential resources for travelling in Japan
Travel Insurance – If you’re backpacking Japan, it’s a good idea to make sure you’re covered for any accidents or losses. We spent days and weeks searching for insurance, but most insurers would not allow us to take out a policy as we were already abroad. Our personal choice is Safteywing. You can opt for automatic monthly payments, just like a subscription. More importantly, it is available in 180 countries and can be purchased whilst already travelling. There is no cap on the duration of travel.
Visa – Before you travel to any country, make sure to check if you need a visa. iVisa is a fantastic website that is super easy and quick to use. Just type in where you are from. and where you are going. to check if you need a visa. If you do, you can quickly make an application online.
Accommodation – Booking.com is our go-to when looking to pre-book accommodation online. Booking.com tend to almost always have the best rates and a FREE cancellation policy for most properties.
Tours & Activities – If you want to book tours and activities online, make sure to check out Get Your Guide. Get Your Guide takes the stress out of booking activities abroad. You will also find a range of benefits, such as skip-the-line passes, lunch included in your tours, and so much more.
Travel tips ebook -Before you head off on your adventure, make sure to download our free ebook. It has a whopping 109 budget travel tips to help you make your hard-earned cash go further. Click here to download your FREE ebook.
We hope you enjoyed this backpacking Japan itinerary, which takes in the sights from Tokyo, Kyoto, and Hiroshima! Of course, this itinerary doesn’t cover everything that Japan has to offer, but we think it is the perfect first time Japan itinerary. Psst…did you know flights to Jeju Island in South Korea, are cheap from Japan? You can find our Jeju itinerary here.
Like this backpacking Japan itinerary? Pin it!

Like!! Thank you for publishing this awesome article.
Nice article. Japan is on our bucketlist:)
Thanks, hope you get to visit soon!
It´s so good to know that a trip to Japan can be not so expensive! Because this is a country i really want to go in the next years.
Yeah, it can be cheap if you plan ahead. Enjoy your future trip to Japan 🙂
This is a great itinerary for me, especially as I want to visit Japan so badly! I love the look of Kyoto, and think I would take at least 500 photos of everything. I’m not a backpacker though, but would still follow your guide!
Thanks, we are glad you found it useful 🙂 Kyoto is amazing! It is my favourite place in Japan. There are so many temples and beautiful things to see there. Hope you get to visit soon!
I always wonder how Japan looks like. All the images are pretty cool and the tips are very detailed. Good work 🙂
Thanks a lot for your comment 🙂
love reading such travel post, where not only get insight about the place but some tips to keep on track and doesn’t carried away with spending. Thank you for sharing
Thanks for your comment 🙂 Glad you found it useful to get an insight into Japan.
Wow this is great! So much to do – Japan isn’t huge on my bucket list, but some of this stuff really got my attention!!
Glad some of it has inspired you to visit 🙂 Thanks for the comment.
Hakone is the best 🙂 I hardly wanna go there. The view of the temple and mount fuji are just too good to miss. Something I would love to see when I am in Japan
Yeah Fuji looks so beautiful. We need to go back to see it properly on a clear day. When we went it was quite misty.
This is a great post – I love that you gave a detailed overview of the budget and how much you spent on your trip. It’s great that you were able to go there and explore a lot of Japan on a budget! I haven’t been myself but would love to visit Tojyo and the Fujiyama one day.
I’d also love to hear more about Fukushima! The picture you posted looks surreal. How did you like the site?
Thanks, I’m glad you enjoyed the post. Whilst we did it on a budget it was still super fun as we had the chance to meet locals through hitchhiking and couch-surfing. The picture is taken in Hiroshima; it was very interesting to learn about the bomb blast and we got to speak to a man who was affected by it when he was a baby. We just happened to be there on the anniversary and lots of people were protesting against wars. Hope you get the chance to see for yourself one day 🙂